Send documents from corporate email
This section describes the settings for Send documents from corporate email which has different steps as follows:
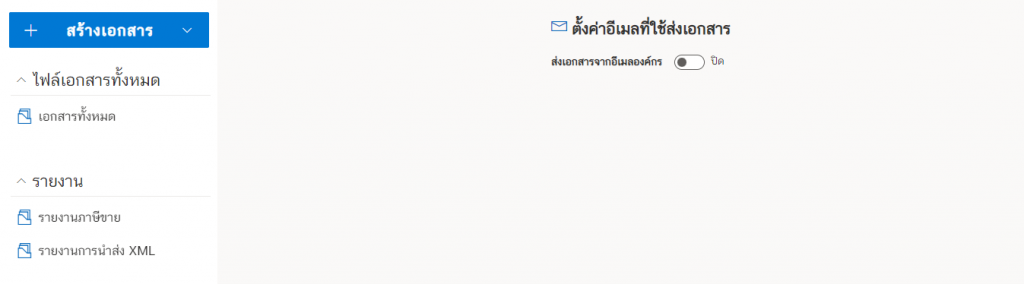
1. Enter the menu page. “Set up the email address used to send documents”
On the left-hand menu, on the ตั้งค่า (Setting), then click on the ตั้งค่าอีเมลที่ใช้ส่งเอกสาร (Set up the email address used to send documents)

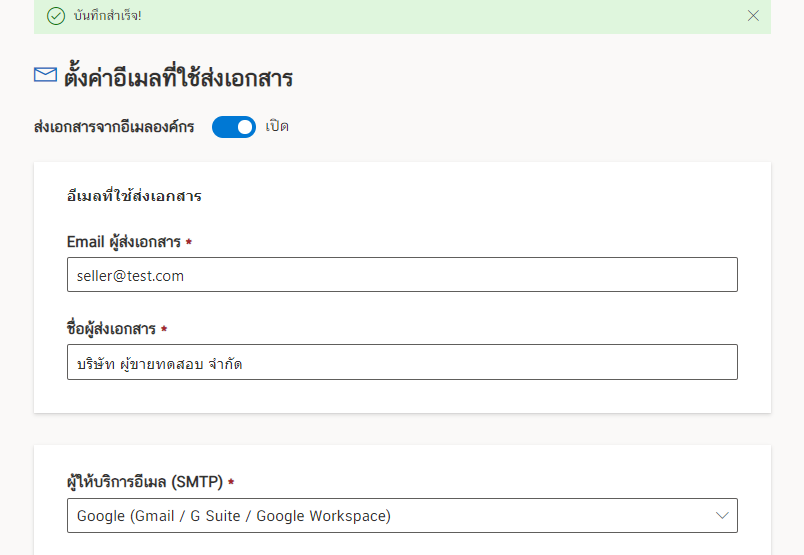
After entering the page ตั้งค่าอีเมลที่ใช้ส่งเอกสาร (Email for sending documents) , you will see that “Send documents from corporate email” is disabled.
To turn on “Send documents from corporate email” by clicking on the circle button to move to the right.
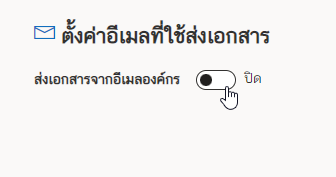
which will take you to the settings page “Send documents from corporate email” as in the picture.
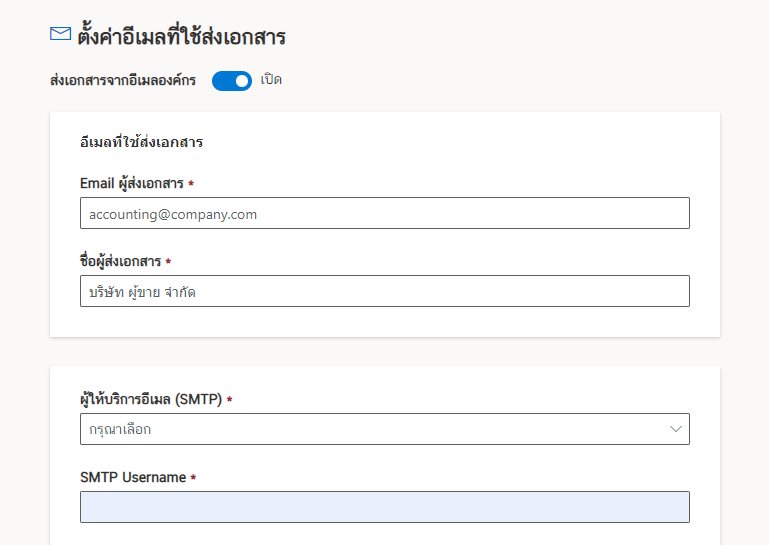
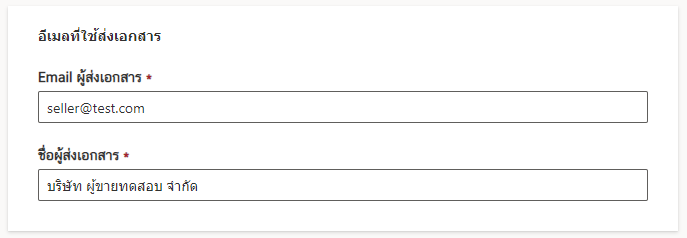
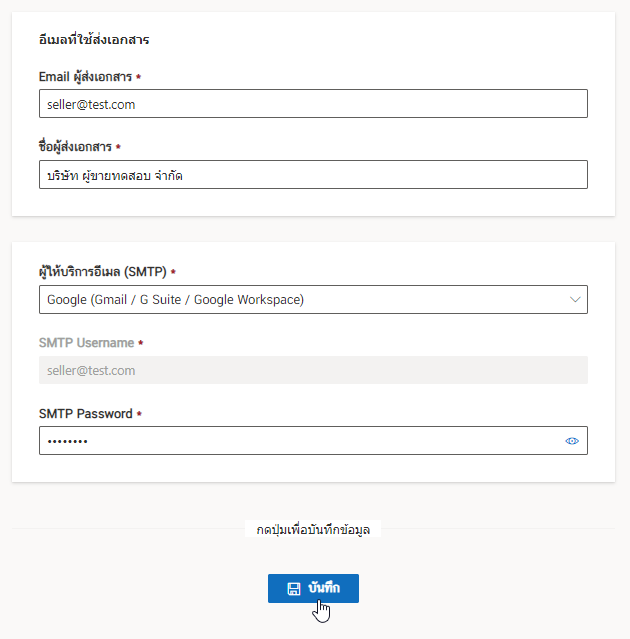
2. Email used to send documents
This section will be filled out on Email ผู้ส่งเอกสาร (Email of sender) and ชื่อผู้ส่งเอกสาร (Name of sender)
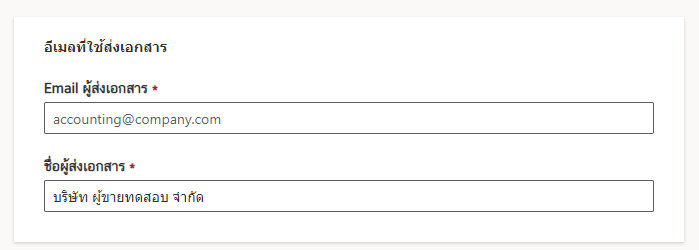
At Email ผู้ส่งเอกสาร (Email of sender)enter the corporate email address used as an example.

And in part of the ชื่อผู้ส่งเอกสาร (Name of sender), you can use company name or the name of the organization as an example

When filling out the information, it will be shown as an example.
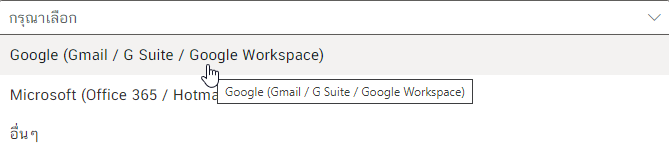
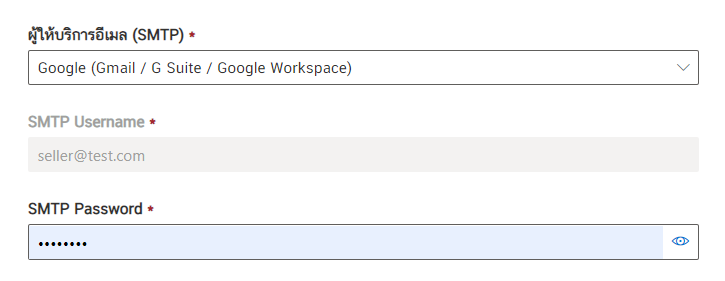
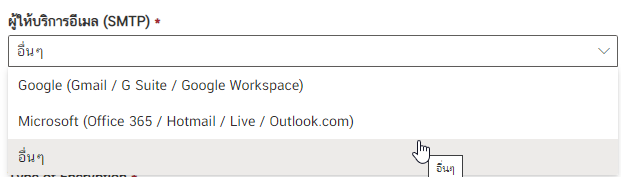
3. Email Service Provider (SMTP)
This section describes Google and Microsoft email service providers (SMTPs) that have the same setup and input methods.
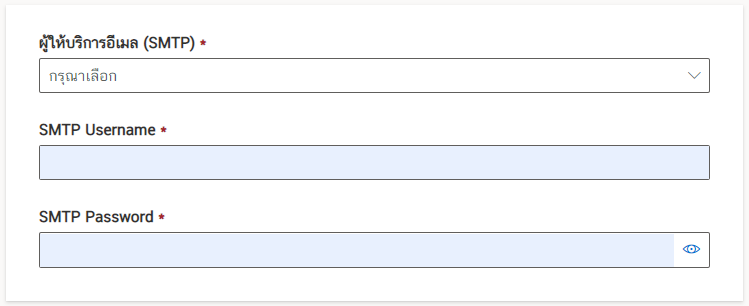
by making a selection ผู้ให้บริการอีเมล (SMTP) (Email Service Provider - SMTP) which will be available as shown in the figure (where “Others” will be explained in Section 4).
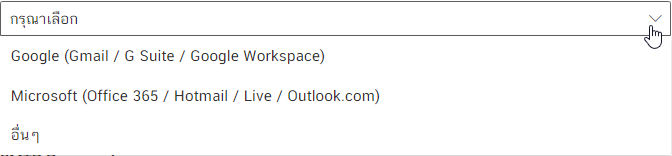
In the example, select Google services as shown in the picture.
In the SMTP Username field, the system will automatically enter the e-mail that has been entered in item 2. In the SMTP Password section, enter the password that encoded in that e-mail.
Then click on the บันทึก (Save) button.
When the data is saved successfully, a message with a green background will be displayed. “Record Success”
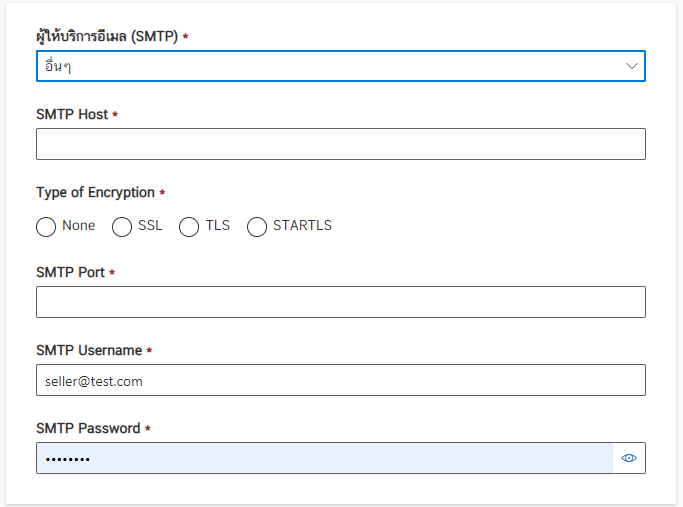
4. Other Email Service Providers (SMTP)
If the email provider is not Google or Microsoft, then it can be selected as “Other”.
Then there will be different parts to enter as follows:
- SMTP HOST : Enter the server of the email service.
- Type of Encryption : Available as “None”, “SSL”, “TLS” and “STARTLS”.
- SMTP Port : Enter the port number of SMTP.
- SMTP Username : Your organization’s email address. (If filling in item 2 “Email used to send documents”), the system will automatically fill in
- SMTP Password : The e-mail code that has been entered.
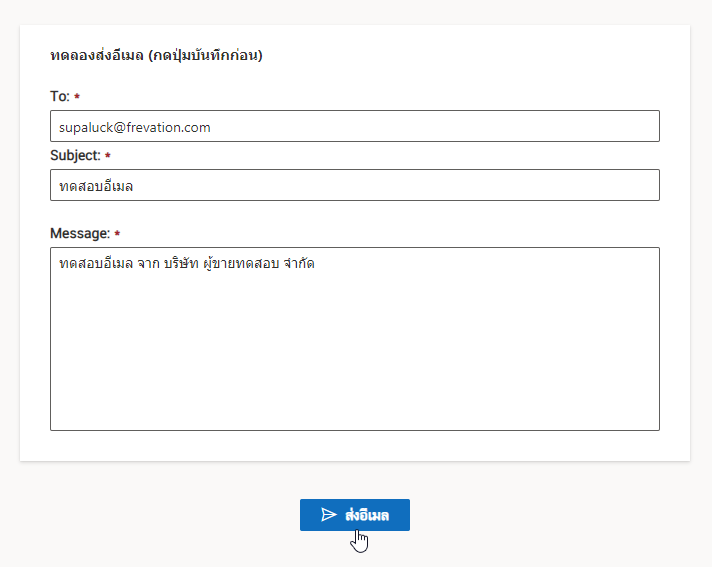
5. Try sending an email (press the record button first)
Then do a test email which will fill in the information as shown in the picture.
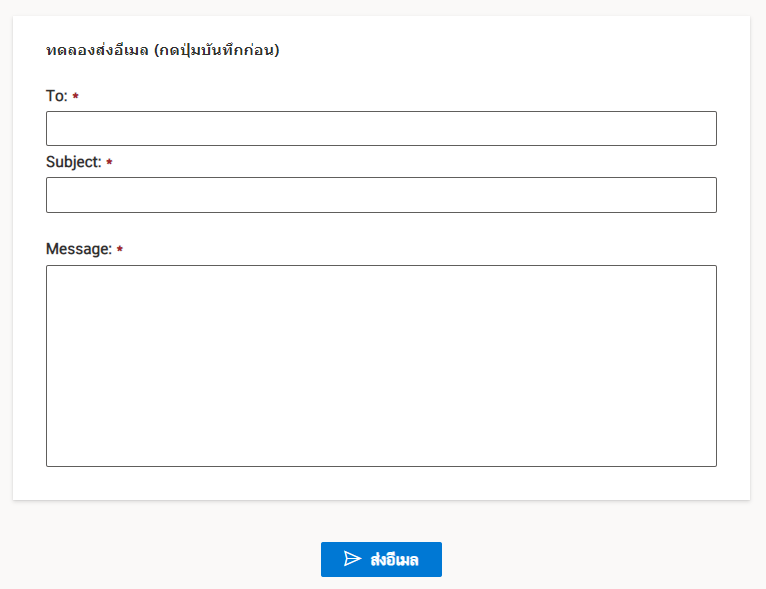
and then enter the following information:
- To : Enter destination email.
- Subject : Title.
- Message : Message.
When everything is fine, press the ส่งอีเมล (Send Email) button.